Web Setup
Prerequisites
- Node.js 20+
- pnpm
- A provisioned Supabase project. If you do not have one, do the Supabase Setup guide first.
Environment Variables
Copy .env.example to .env.local. Then set each variable as this section shows.
cp .env.example .env.local
NEXT_PUBLIC_SUPABASE_URL
The base URL of your Supabase project. All API calls from the frontend go through this URL.
How to find it:
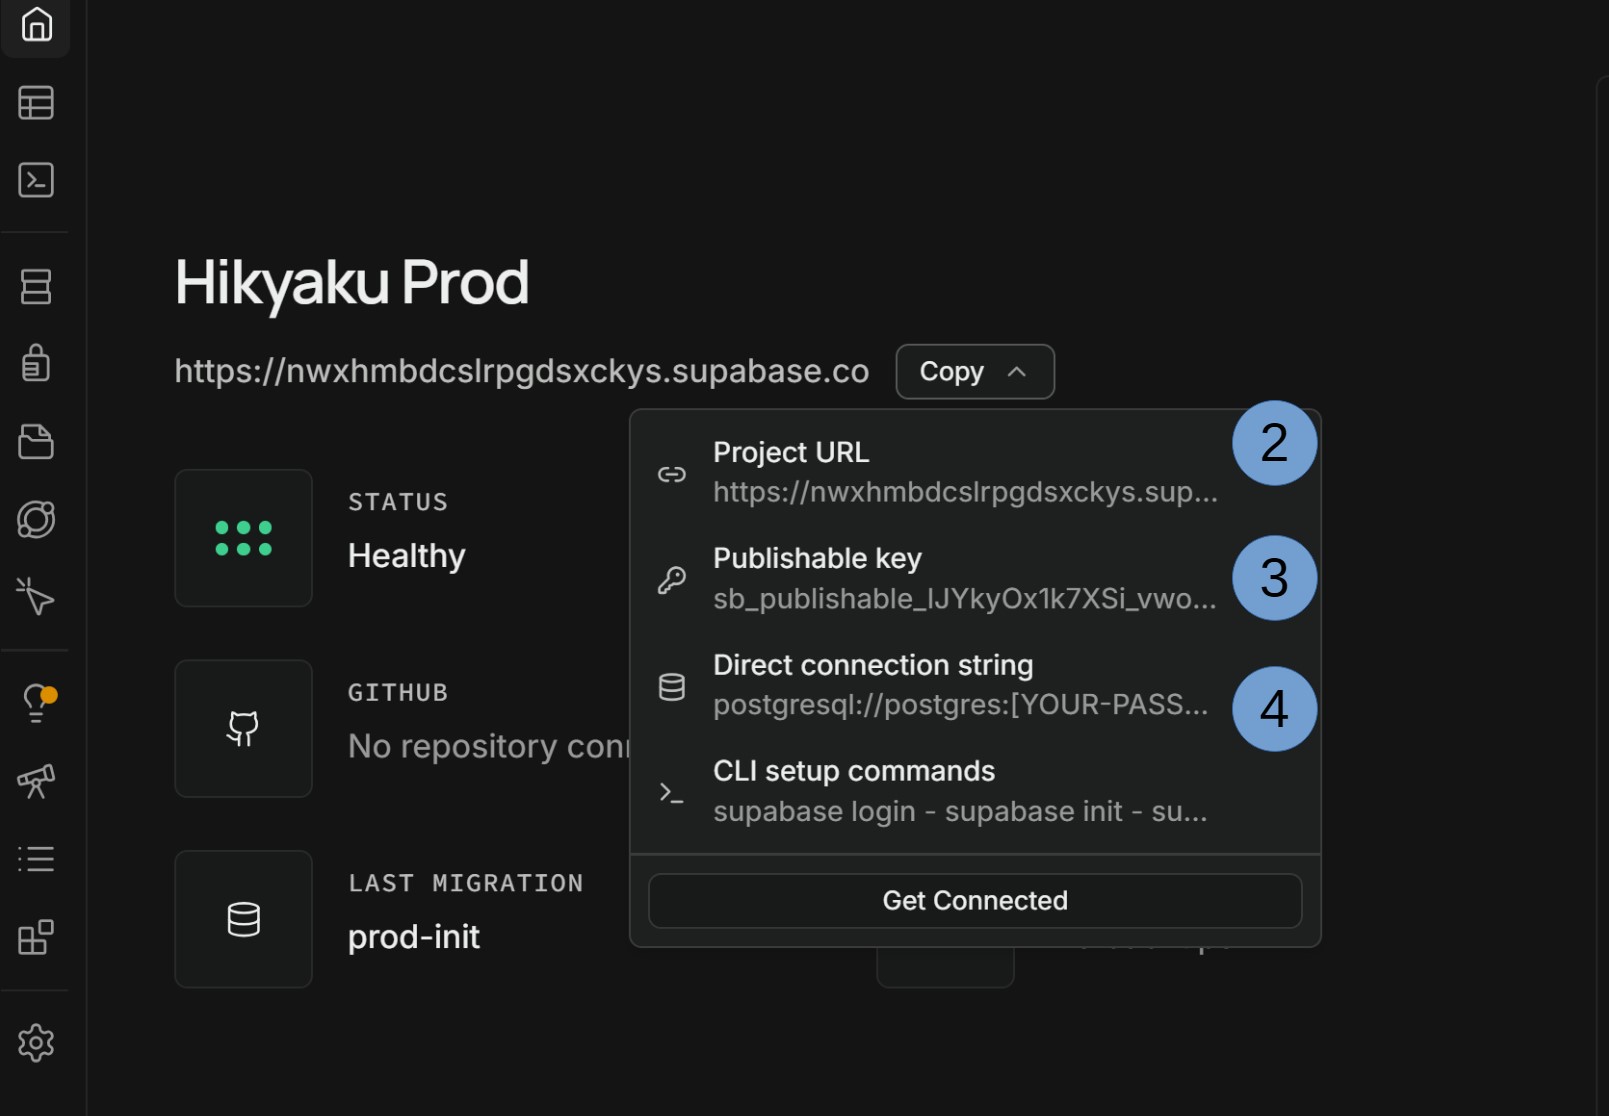
- On the Project Overview page, click the dropdown menu.
- Copy the value under Project URL (for example,
https://abcdefghijklmnop.supabase.co).
NEXT_PUBLIC_SUPABASE_URL=https://abcdefghijklmnop.supabase.co
NEXT_PUBLIC_SUPABASE_PUBLISHABLE_OR_ANON_KEY
The publishable key that the browser uses to authenticate requests to Supabase. Row-level security policies limit the access of this key. Thus, you can safely put this key in client-side code.
How to find it:
- On the Project Overview page, click the dropdown menu.
- Copy the value under Publishable key.

NEXT_PUBLIC_SUPABASE_PUBLISHABLE_OR_ANON_KEY=sb_publishable_xxx.
Do not use the service role key here. The service role key bypasses row-level security. Use it only in trusted server-side code.
NEXT_PUBLIC_OSM_TILE_URL
The tile server URL that MapLibre uses to render the base map tiles. At runtime, MapLibre replaces the {s}, {z}, {x}, and {y} placeholders.
To use the public OpenStreetMap tile server, leave this variable empty or set it to the default. If you host your own tiles or use a commercial tile provider, set a custom URL.
# Public OSM tile server (default)
NEXT_PUBLIC_OSM_TILE_URL=https://{s}.tile.openstreetmap.org/{z}/{x}/{y}.png

# Leave blank to fall back to the same default
NEXT_PUBLIC_OSM_TILE_URL=
NEXT_PUBLIC_HIKYAKU_API_URL
The base URL of hikyaku-api, the NestJS backend. To install the API, refer to the NestJS API guide.
NEXT_PUBLIC_HIKYAKU_API_URL=http://localhost:3002
NEXT_PUBLIC_ROOT_DOMAIN
The root domain of the tenants. Each tenant has the address <slug>.<root>. For subdomain-based customer booking sites, set this variable to a domain that you control. For the wildcard TLS prerequisites, refer to Before You Go to Production.
# prod
NEXT_PUBLIC_ROOT_DOMAIN=hikyaku.org

# local
NEXT_PUBLIC_ROOT_DOMAIN=localhost:3000
TENANT_PROXY_SECRET
A secret that the app shares with the Cloudflare Worker in workers/tenant-proxy. The Worker serves the <slug>.hikyaku.org vanity hosts. The middleware accepts the tenant host from the Worker only if this value matches. Thus, the value must be the same in the app and in the Worker. For the reason, refer to Architecture → Why the Worker is necessary.
TENANT_PROXY_SECRET=$(openssl rand -hex 32)
For local development, do not set this variable. Subdomains go directly to the dev server. The Host header is correct, and there is no proxy.
NEXT_PUBLIC_GOOGLE_CLIENT_ID
The Google OAuth web client ID. Get it from the Google Cloud Console, under Credentials. This ID controls the "Sign in with Google" button and One Tap on the auth pages. The buttons show only when you set this variable.
NEXT_PUBLIC_GOOGLE_CLIENT_ID=xxxx.apps.googleusercontent.com
This app does not use the client secret. Put the secret in the Supabase dashboard, under Authentication → Providers → Google. Also add this client ID to the Authorized Client IDs field of that provider. If you do not, signInWithIdToken rejects the token.
NEXT_PUBLIC_WEBAUTHN_MFA_ENABLED
Shows the "Add security key" control in the account settings.
NEXT_PUBLIC_WEBAUTHN_MFA_ENABLED=true
By default, Supabase projects disable WebAuthn MFA enrollment. The Supabase Dashboard has no toggle for this setting yet. Before you set this variable, enable WebAuthn MFA with this Management API call:
PATCH /v1/projects/<ref>/config/auth
{"mfa_web_authn_enroll_enabled": true, "mfa_web_authn_verify_enabled": true}
Until the server-side setting is enabled, set this variable to false or do not set it. If you set it to true too early, the button fails with "MFA enroll is disabled for WebAuthn".
Run the App
- Clone https://github.com/hikyakuorg/hikyaku.
- Copy
.env.exampleto.env.local. Set each variable as the section above shows. - Install the dependencies.
- Start the development server.
pnpm install
pnpm dev
App URL: